EDR Velociraptor (free)
Author: Stefan Waldvogel
-under construction-
Overview:
Velociraptor is a free, advanced open-source endpoint monitoring, digital forensic and cyber response platform. It is easy to use and quick to install and you can run a server and the client at the same machine.
Fastest way (Self Signed SSL mode) is very simple. Download the velociraptor exe on github (github.com/Velocidex/velociraptor/releases/tag/v0.5.9-rc1) and run the executable via a administrator terminal.
velociraptor{version}.exe gui

Your browser will indicate a SSL problem, agree and that is it. Now you have a full server and a client add the same machine. This is great for tests.
This article shows you a more complicated way where you can adjust more things and add a proper certificate and a more secure system.
For this task, I recommend to use John Strand's ADHD VM, but you can use any Windows VM with internet connection. You can download a 90 day Windows 10 test version here: www.microsoft.com/en-us/evalcenter/evaluate-windows-10-enterprise
Documentation:
www.velocidex.com/docs/
GitHub download link:
github.com/Velocidex/velociraptor/releases (newest version)
github.com/Velocidex/velociraptor/releases/tag/v0.5.8-rc1
For our lab environment, we need an amd64 version. This version runs on all Windows (64 -bit) machines. If you want to follow the lab, please download it. The program works for the server and the client.

To install Velociraptor, you can follow this guide or you can use the documentation for the stand_alone installation (https://www.velocidex.com/docs/getting-started/stand_alone/) First, we need to install the server and second the client.
|
Server installation
- start the terminal as administrator 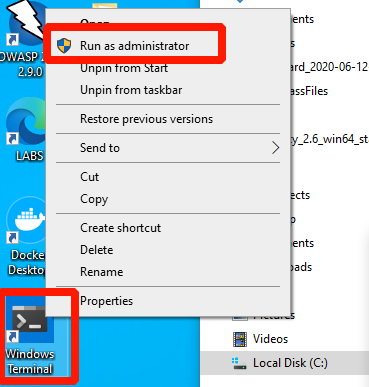
If you do not have the icon on the screen, type "cmd" into the search field and you get a "Command prompt".
If you run the command prompt, you should accept the following question: 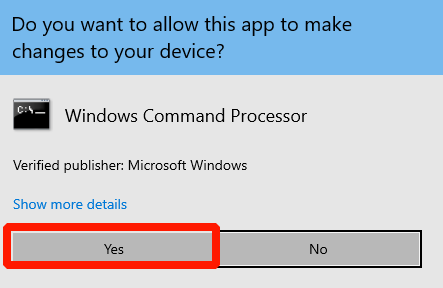
The console points to system32 but this is place is ful of programs and tools. It is better to move us to the Downloads folder with:
cd C:\Users\{username}\Downloads dir Please do not copy this command, you have to use your username. 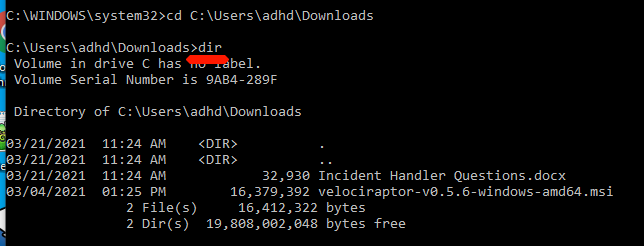
With the "dir" command you can check if you are in the right folder with the velociraptor exe. Here, it is v0.5.6 but this will change in the future.
Hint: if you use an upgraded adhd VM, the installed version might not work and you get errors later. Download the newest version. The next steps configure velociraptor and the command is: velociraptor-v05.8-rc2-windows-amd64.exe config generate -i 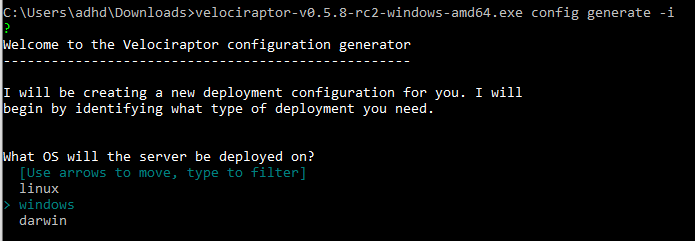
Now, you can select your OS, here it is windows. Hint enter.
The path is fine, too. 
A self signed SSL cert is, okay. Enter
The public dns name is here localhost. We hit enter again. 
The port is 8000. Enter
GUI port is 8889. Enter We do NOT use a DynDNS and we set it to n 
We do not use an email for the GUI. Enter
The log path is okay. Enter 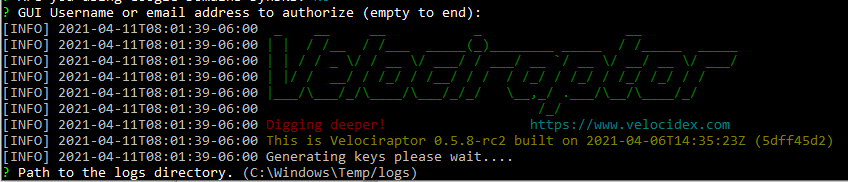
The next two options are standard, too. Hit enter.

The server GUI
The server is installed, but we want to use the GUI and first we need to add a GUI user with: velociraptor-v{your version.exe} --config server.config.yaml user add root --role administrator You will be asked for a password. 
Starting the server
The commad to start the server is this: velociraptor{yourversion.exe} --config server.config.yaml frontend -v 
You see some red errors, this is okay. Velociraptor is updating some tools and at the end you get a link to the GUI. It should be:
https://127.0.0.1:8889 
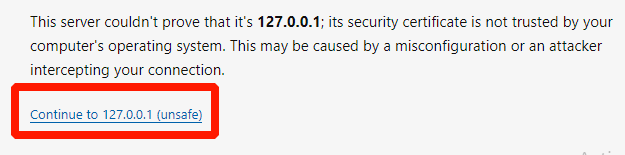
Copy the path to your browser and you get a warning message.
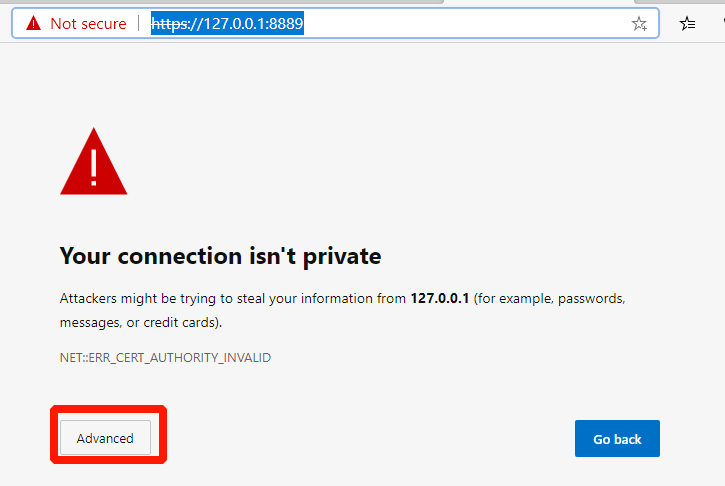
Click on "continue"
The next window is a authentication request.
The username is: root The password is: It is your selected password 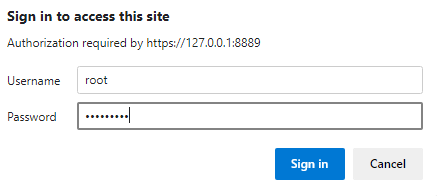
It can take or or two minutes to load.
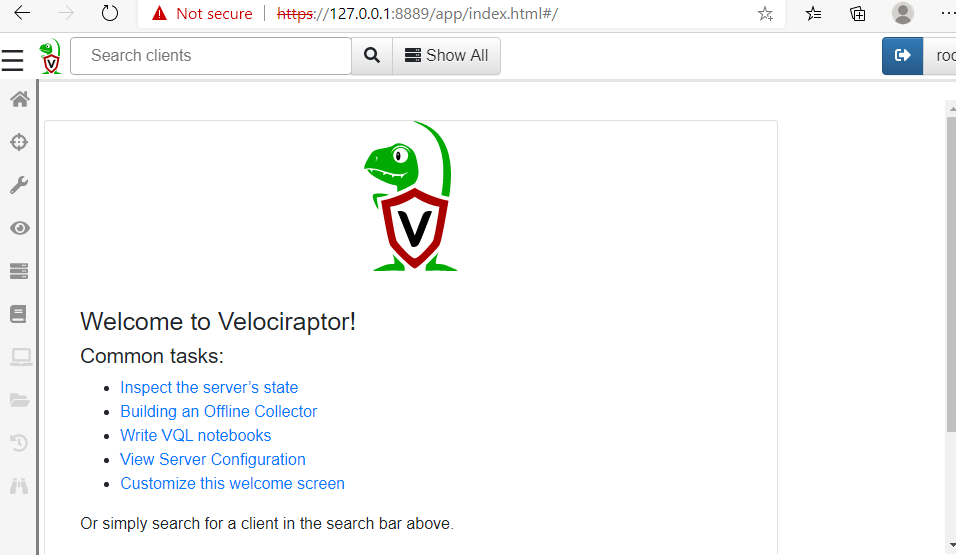
Congratulations, your server is ready. Now we have to set up a client. (follow the right column to set it up.)
|
Client installation
The client installation is easier compared to the server installation and we need one command to start the client. Start a new terminal (cmd-command line) as administrator. 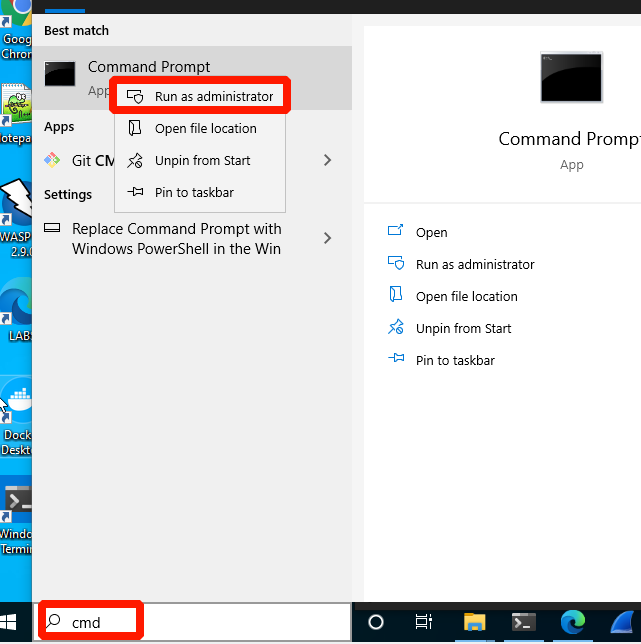
Now, change the cursor to the Downloads directory with
cd C:\Users\{username}\Downloads\ 
Now, we can start the client with the following command:
velociraptor{yourversion.exe} --config client.config.yaml client -v Hint: if you downloaded one version, you can use "tab" to autocomplete the name. 
Add this point, the client is running and we can open the server GUI.
The server GUI runs on: https://127.0.0.1:8889 (Most likely you already opened it.) scroll down for the next steps Errors: 
If you install Velociraptor on a new machine, you have to create a Velociraptor folder under Program Files.
|
Exploring Velociraptor
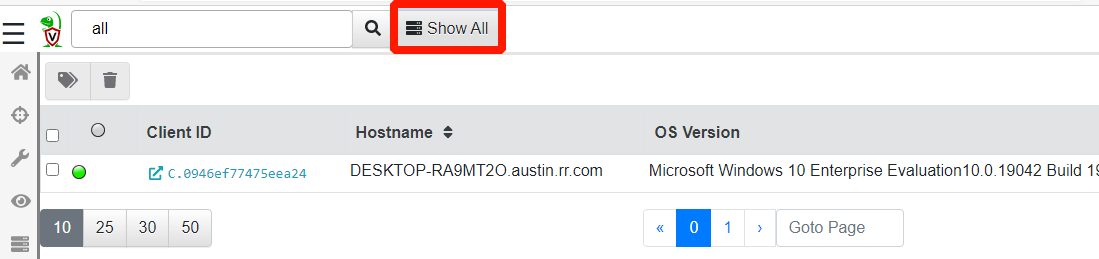
First, we have to check if the Velociraptor's server sees our client. We have to click on the dashboard button
First, we have to check if the Velociraptor's server sees our client. We have to click on the dashboard button

The next step is to find our client, so we can interact with it. Velociraptor is a more or less a beta and sometimes you have a connection, but the table is empty.

I installed it on a new machine and now it works. I have a client ID and I can interact with machines.
We can click on the ID and we see an overview about the system. Additionally we can collect data or send commands to the machine.
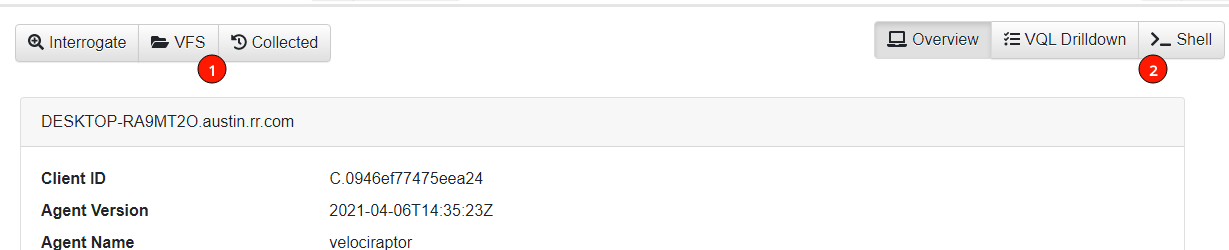
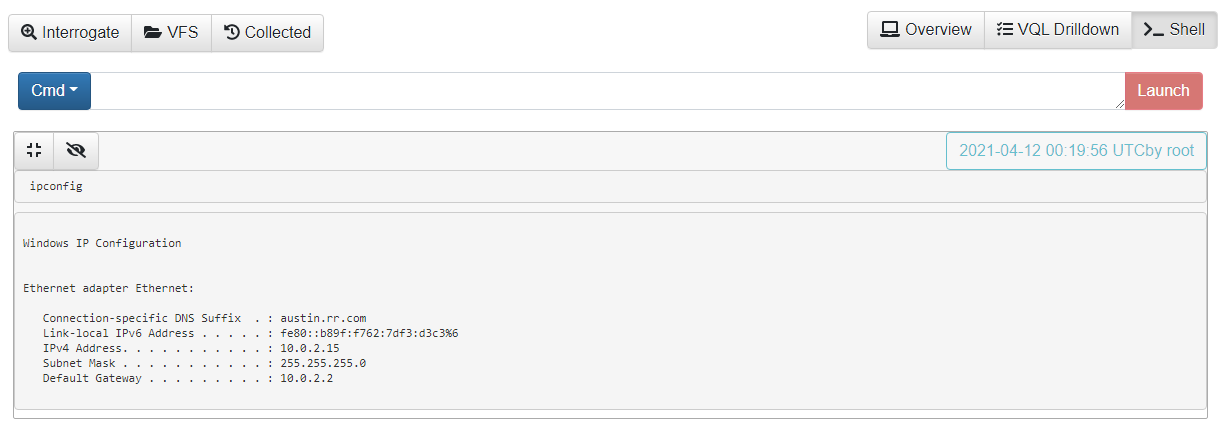
The shell function looks like this:
Short overview how to investigate (Endpoint Analysis)
We can do a manual endpoint analysis on this machine. I show you some basic commands so you get the first idea but I am not a trained blue teamer (not yet).
-- If you are interested in this topic, try to do John Strand's SOC training. It is a pay as you can course (16 hours) and gives you a solid start point about this field. --
With this remote command line, we can investigate this machine. Usually it is a good idea to start with network connections and we can use commands like:
net view
net session
net use
netstat
netstat -naob --> This is a very useful command, because we get a PID for further investigation.
netstat -f
Maybe we see a suspicious connection and we have the PID. Some relevant commands:
tasklist
tasklist /svc
tasklist /m
wmic process list full
© 2021. This work is licensed under a CC BY-SA 4.0 license