RITA
Author: Stefan Waldvogel
Installation and use of RITA on Ubuntu 20.04
Overview:
Real Intelligence Threat Analytics (RITA) is a framework for detecting command and control communication through network traffic analysis. The installer script works with Ubuntu 18.04 LTS, Ubuntu 16.04 LTS, Security Onion, and CentOS 7, but you can use other Linux versions, too. Two different modes are available:
- Generate pcaps and transform them into a Zeek log (more for teaching purpose)
- Install Zeek and let it monitor an interface directly ("instant" analysis via SPAN port)
Download:
github.com/activecm/rita/releases Pick the newest release from this list.
Official Readme:
https://github.com/activecm/rita/blob/master/Readme.md
Installation (short version, see the official readme for more options):
In this guide, I am installing RITA on Ubuntu 20.04 LTS, therefore the installer does not work 100% and we have to fix some small things. If you have less experience or you have more problems, use a supported OS like Ubuntu 18.04 LTS.
Download the latest install.sh file here and make it executable:
chmod +x ./install.sh
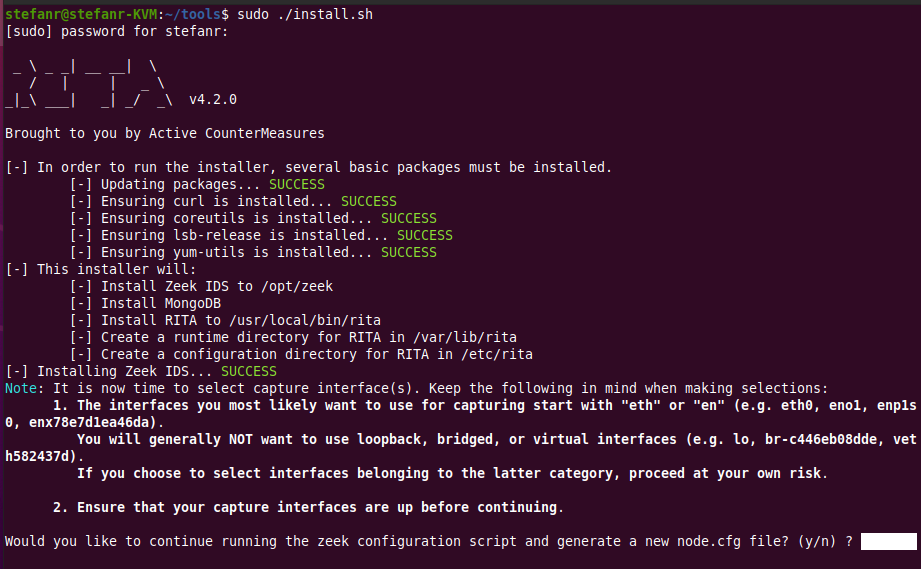
sudo ./install.sh
will install RITA as well as supported versions of Zeek and MongoDB.
will install RITA as well as supported versions of Zeek and MongoDB.

Now, you need to configure RITA. Generate a new node.cfg file.
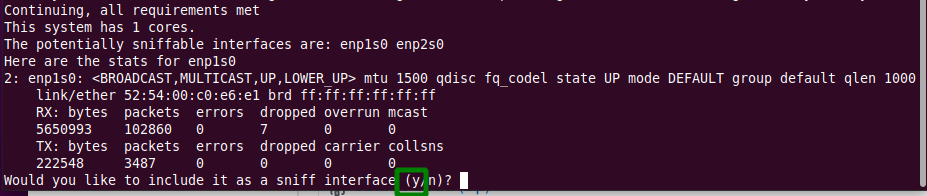
On my machine, I have two network cards, and I can sniff one card.
If if something went wrong, restart the installer and overwrite the node.cfg file.
Reboot your machine with
sudo reboot
Next step is testing if zeek is running. You can do it with the command:
zeek -h
Reboot your machine with
sudo reboot
Next step is testing if zeek is running. You can do it with the command:
zeek -h

Zeek generates log files (maybe you have to wait an hour). Use the command:
locate *.log.gz
to find them. If you cannot find them, use the command
sudo updatedb
to update the database so you can see the new files.
locate *.log.gz
to find them. If you cannot find them, use the command
sudo updatedb
to update the database so you can see the new files.

On my system the installer failed to install RITA and MongoDB. That is not a problem. Use the manual way to install it.
Install RITA
The commands are:
sudo apt install golang-go
git clone https://github.com/activecm/rita.git
cd rita
make install
sudo mkdir /etc/rita && sudo chmod 755 /etc/rita
sudo mkdir -p /var/lib/rita/logs && sudo chmod -R 755 /var/lib/rita
sudo cp etc/rita.yaml /etc/rita/config.yaml && sudo chmod 666 /etc/rita/config.yaml
We can see your configuration with the command:
rita test-config
-> On my system, I saw a database connection error.
If you do not have an error, you can import data into RITA with the command:
sudo rita import /opt/zeek/logs/2021-05-15/* database1
Install MongoDB
In my case, it didn't work, because MongoDB was not installed. The script failed, I have to install it manually.
sudo apt-get install -y mongodb
Now, we have to find out if we use systemd or System V init. The command is:
ps --no-headers -o comm 1
--> here we see the result. With Ubuntu 18 it is systemd and we can start the service with:
sudo systemctl start mongodb
sudo systemctl enable mongodb --> automatic start
Import data into RITA
Now we fixed the problems, and we can run the command:
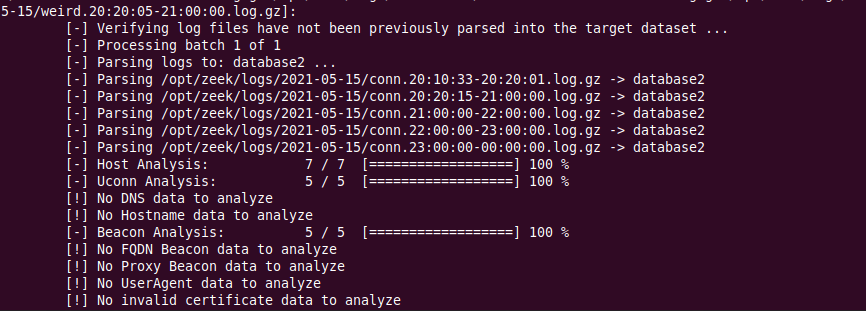
sudo rita import /opt/zeek/logs/2021-05-15/* database2
again and RITA is importing the data into the database. It should look like this:
Install RITA
The commands are:
sudo apt install golang-go
git clone https://github.com/activecm/rita.git
cd rita
make install
sudo mkdir /etc/rita && sudo chmod 755 /etc/rita
sudo mkdir -p /var/lib/rita/logs && sudo chmod -R 755 /var/lib/rita
sudo cp etc/rita.yaml /etc/rita/config.yaml && sudo chmod 666 /etc/rita/config.yaml
We can see your configuration with the command:
rita test-config
-> On my system, I saw a database connection error.
If you do not have an error, you can import data into RITA with the command:
sudo rita import /opt/zeek/logs/2021-05-15/* database1
Install MongoDB
In my case, it didn't work, because MongoDB was not installed. The script failed, I have to install it manually.
sudo apt-get install -y mongodb
Now, we have to find out if we use systemd or System V init. The command is:
ps --no-headers -o comm 1
--> here we see the result. With Ubuntu 18 it is systemd and we can start the service with:
sudo systemctl start mongodb
sudo systemctl enable mongodb --> automatic start
Import data into RITA
Now we fixed the problems, and we can run the command:
sudo rita import /opt/zeek/logs/2021-05-15/* database2
again and RITA is importing the data into the database. It should look like this:
If we have problems, RITA generate logs under /var/lib/rita/logs. Use the official readme file to fix the problems.

(You can left the output with q)
Finally we can use RITA
The command is simple:
rita show-beacons database2 -H
-> database2 is a placeholder for your database name. If you forgot the name, just use the command
rita list
to see all the databases. The switch -H is a format switch. It looks more organized and you see the columns.
Finally we can use RITA
The command is simple:
rita show-beacons database2 -H
-> database2 is a placeholder for your database name. If you forgot the name, just use the command
rita list
to see all the databases. The switch -H is a format switch. It looks more organized and you see the columns.

What do we get?
The most important field is the first field, and it is the score. Here is my example, and the score is 0.84. If you run it on your own machine, you see very different output.
Score:0.84
Source IP:192.168.1.20
Destination IP:35.224.170.84
Connections:46
--> this is a connection to Google Cloud
Not everything is malicious. This connection does not have dispersion and the time is fix. The connection does not try to hide. You see such things often. If you activate "set automatic time," you use NTP on port UDP/123.
This is a constant connection/beacon and is usually wanted. If you use dropbox or something similar, it might look very similar to a C2 connection, but it is not dangerous.
At this point, you have the skills to see what is going on, but most likely you do not have the skills to see if it is malicious or not.

You can try other commands like:
sudo rita show-long-connections database2
A nice feature is the report feature and the command is
sudo rita html-report database2
sudo rita show-long-connections database2
A nice feature is the report feature and the command is
sudo rita html-report database2

This creates some html files and it looks nice.
Taidoor hands-on lab
Sniffing and tracking your own traffic is great, but most likely you want to brush up your skills. Hopefully, your machine does not have malware installed, but you want to practice.
Many companies offer pcap files and you can download them. Now, you can feed the data into RITA and try to understand what is going on.
Link for training pcaps:
www.malware-traffic-analysis.net/training-exercises.html
www.activecountermeasures.com/malware-of-the-day-taidoor/ --> offers 2 versions, a 1h and a 24h and it is about taidoor/Taurus a (Chinese?) Remote Access Trojan. For our lab, I use the 24 hour taidoor pcap.
Install tshark (optional)
First, we install an additional tool (tshark) to analyze pcaps. The command is:
sudo apt install tshark
Download the 24 hour pcapfile, move it to a wanted place and open a terminal. Run the command:
tshark -n -r taidoor_24hr.pcap | less
If you see something like this:
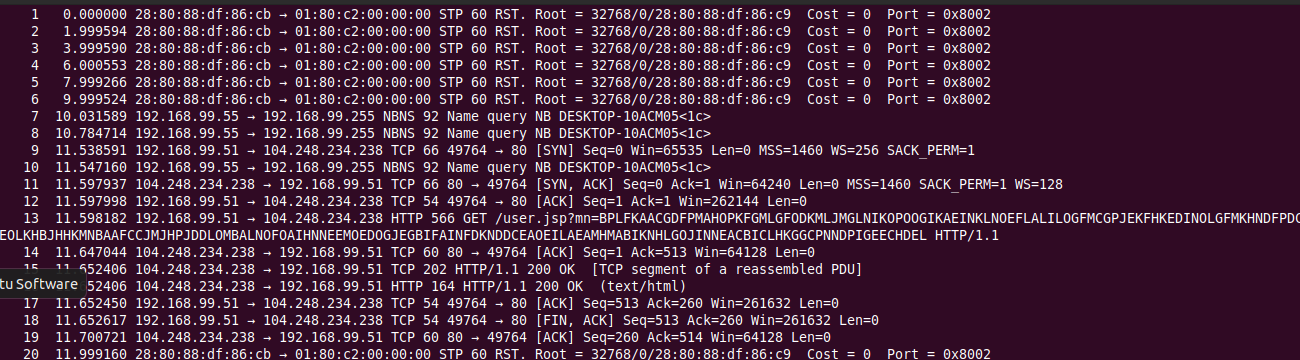
We have the right pcap file. What do you see? This user.js looks suspicious because it is HTTP and encrypted.
Target Host/Victim: 192.168.99.51 – Windows 10 x64
C2 Server: 104.248.234.238
Alternative
If you do not have tshark but tcpdump you can use tcpdump, too. The command is:
tcpdump -n -r taidoor_24hr.pcap | less
Load the pcap file with zeek
The first important step is to load the pcap file with zeek. The command is simple:
zeek -C -r taidoor_24hr.pcap

Wait some seconds and the first step is done. The folder contains now many log files.

Import the files into RITA
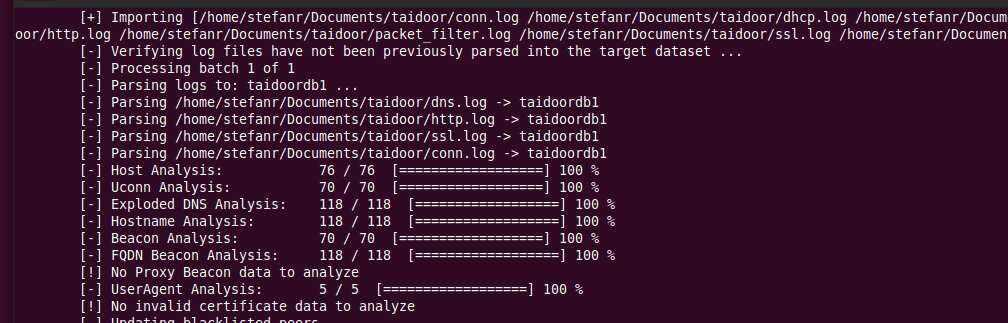
Now we can import the files into RITA with the command:
sudo rita import /home/stefanr/Documents/taidoor/* taidoordb1
You get something like this:
Now we can import the files into RITA with the command:
sudo rita import /home/stefanr/Documents/taidoor/* taidoordb1
You get something like this:
We want to find the beacon and the command is:
sudo rita show-beacons taidoordb1 -H
The output looks like this:
sudo rita show-beacons taidoordb1 -H
The output looks like this:

Why is the first line suspicious?
We see a lot of connections (2615) and the total bytes is huge. This is an indicator, but we can use the command:
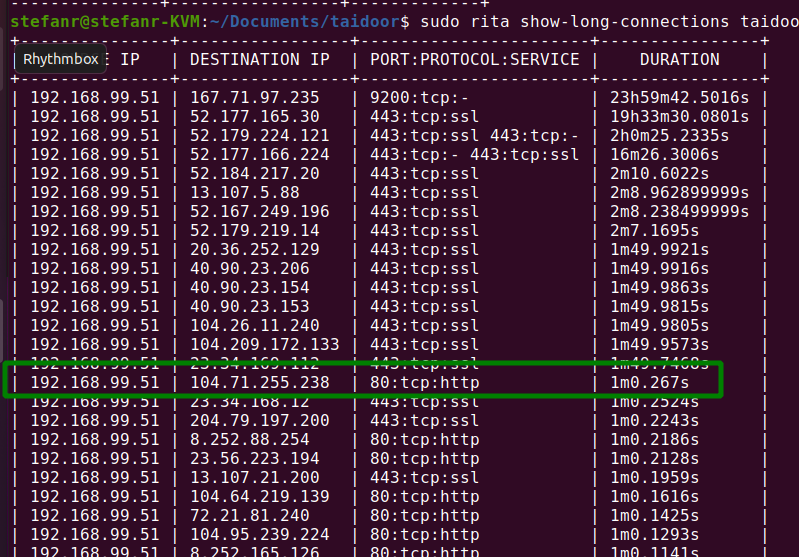
sudo rita show-long-connections taidoordb1 -H
to get a deeper inside of this traffic:
We see a lot of connections (2615) and the total bytes is huge. This is an indicator, but we can use the command:
sudo rita show-long-connections taidoordb1 -H
to get a deeper inside of this traffic:
What next?
Now, we can dive much deeper into the topic. The knowledge is actually free. I did a matching course and you can find it, too:
https://www.linkedin.com/company/active-countermeasures/
Follow the company and register for a free 6-hour course.
Now, we can dive much deeper into the topic. The knowledge is actually free. I did a matching course and you can find it, too:
https://www.linkedin.com/company/active-countermeasures/
Follow the company and register for a free 6-hour course.
© 2021. This work is licensed under a CC BY-SA 4.0 license