pfsense installation
Author: Stefan Waldvogel
How to install pfSense with VMM
Overview
pfSense is a open-source firewall. If we want to build a lab at home, we should use static IP addresses and our lab should look realistic. pfSense is full solution with DHCP, DNS and much more. Remember, we build a lab to gain realistic hands-on.
In a real world, one of the first devices is a firewall because we want to protect out home network.
I am doing this lab with Virtual Machine Manager. Virtual Machine Manager is a free hypervisor for Linux and more powerful than others. You can use VirtualBox, VMWare player, HyperV or other software. The main goal is, you get the idea and you should be able to transfer the knowledge into new tools. The software will change, if you get stuck, read the official guide or watch some matching YouTube videos.
Download link:
www.pfsense.org/download/
Select the architecture (AMD64), the installer (DVD Image) and download the image. The iso is about 360 MB and it will take some minutes.
Preparing the network
During the download time, we have to think about our network. A firewall/router separates two different networks. If you use a pfSense with a hypervisor (VMWare, VirtualBox, ect) one network is pre-configured, but we need a second one for our internal network.
Our first network could look like this:
|

source: https://agussas.wordpress.com/2015/10/28/vmware-networking-concept-bridged-nat-host-only-lan-segment/
|
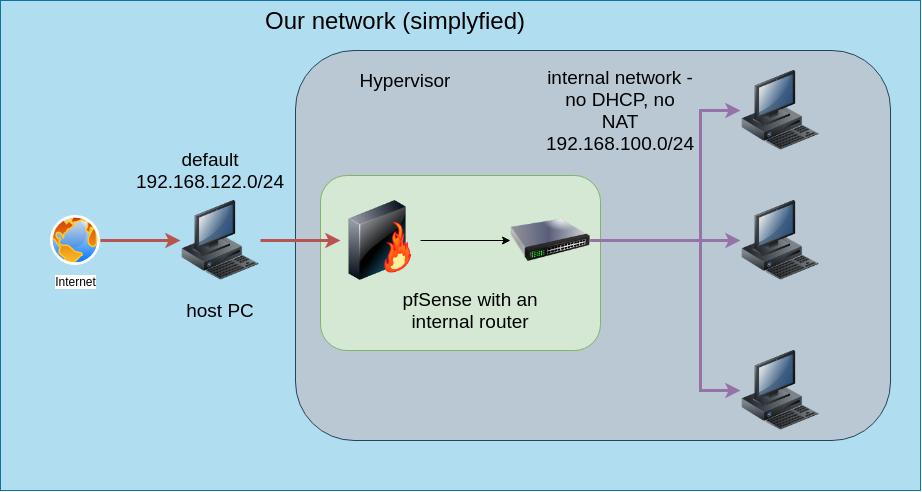
Networks:
default -> with network we connect everything to the internet. The default network offers internet capability and DHCP. This means, if you plug in a new device, this device will get an IP and it works without additional work. Usually, it is configured as NAT (Network Address Translation).
internal network -> we have to create this new network and we have to switch off all the nice features. We just want the "cables" but without intelligence.
Components:
pfSense -> we need at least two Ethernet cards because we have at least two subnets. Incoming and the internal. pfSense is a "smart" device (if we want) and we can reserve IP addresses, route traffic and much more.
Virtual machines -> I will use static IPs and i will switch off DHCP. The reason is, if we add complex tools like a SIEM or EDR, a static IP is easier to handle.
Host PC -> this is our big machine with internet access.
Setting up the networks
For this task, I use Virtual Machine Manager (QEMU/KVM), but you can do similar steps with most hypervisors.

This is the standard setting (on this hypervisor). We can see our network and IP range and NAT is activated. We have to add a new network:
|
|
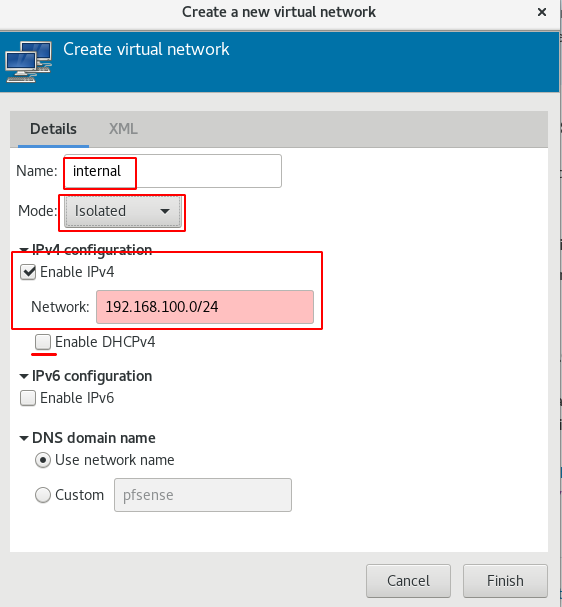
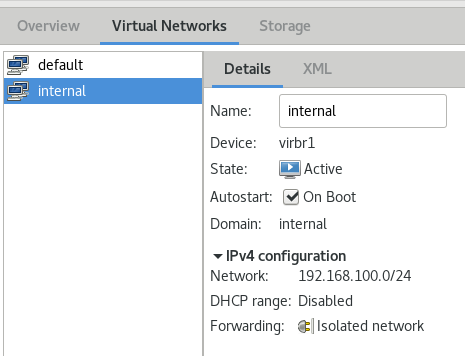
We add the following things:
Name: internal -> if you use VMWare, you cannpot change the name, it does not matter
Mode: I use isolated, because this network does not connect to something. I want the wires, nothing else.
IPv4: I add the wanted IP range and disable DHCP.
Now, we have two networks and can move on to the installation of pfSense.
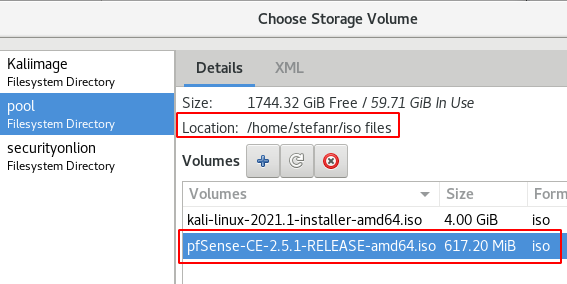
Unpacking the file
After the download, we need to unpack the file. On a Linux the command is:
gunzip pfSense-{your version number}-RELEASE-amd64.iso.gz
If you use Windows, you can use 7-Zip to unpack the file.
If you want, you can move the iso to a new location.
Preparing the hypervisor
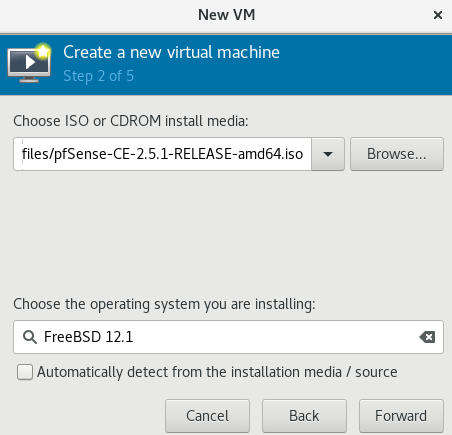
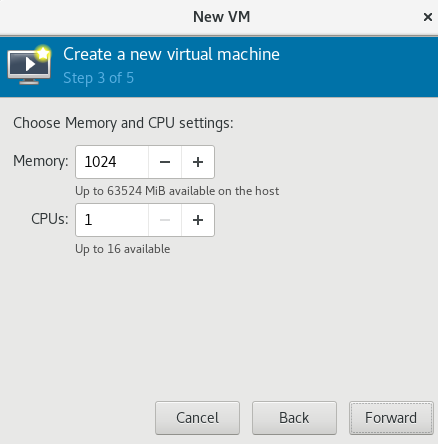
First, we have to know the hardware requirements. pfSense is based on BSDLinux and does not need much:
Now, we can create a new VM:
Name: internal -> if you use VMWare, you cannpot change the name, it does not matter
Mode: I use isolated, because this network does not connect to something. I want the wires, nothing else.
IPv4: I add the wanted IP range and disable DHCP.
Now, we have two networks and can move on to the installation of pfSense.
Unpacking the file
After the download, we need to unpack the file. On a Linux the command is:
gunzip pfSense-{your version number}-RELEASE-amd64.iso.gz
If you use Windows, you can use 7-Zip to unpack the file.
If you want, you can move the iso to a new location.
Preparing the hypervisor
First, we have to know the hardware requirements. pfSense is based on BSDLinux and does not need much:
- 1 core
- 512MB or highr
- 4 GB HDD
- 2 network cards
Now, we can create a new VM:
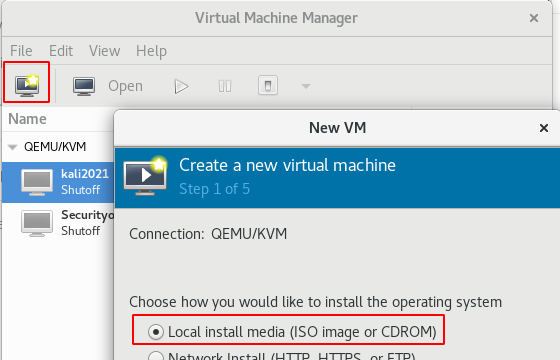
|
|
We have to pick the OS and the hardware.
|
|
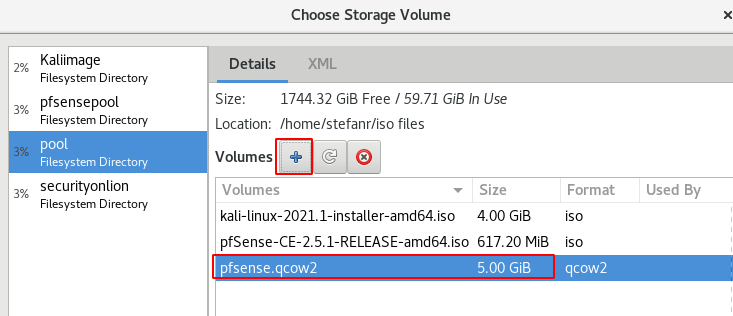
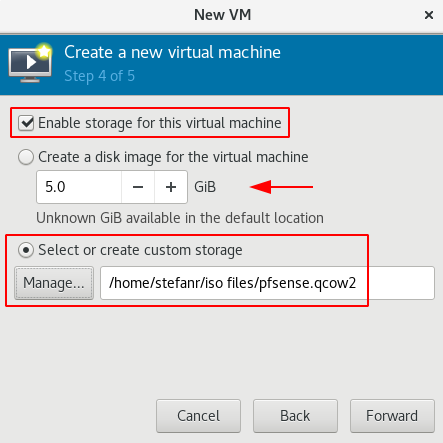
Here, I created a new custom storage with 5 GB on a different path, but you can use the standard path.
|
|
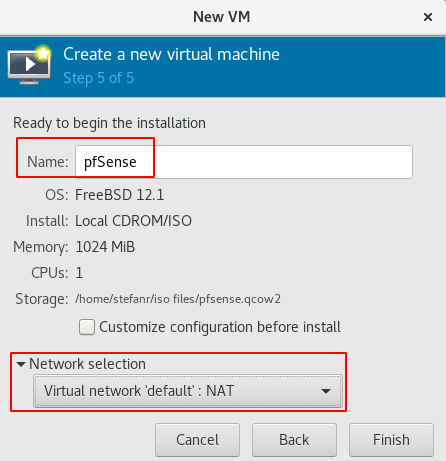
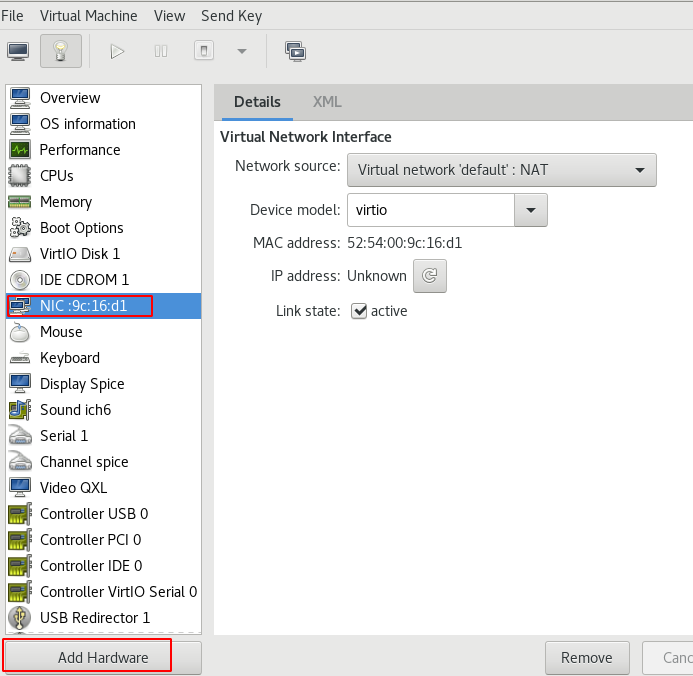
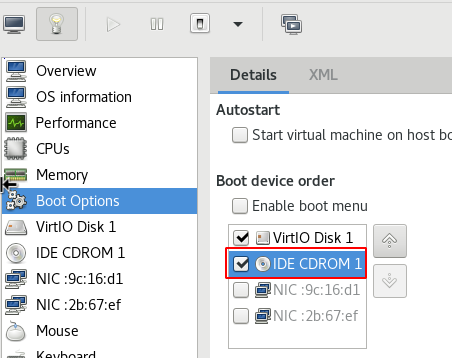
We check all the settings, but we see only one network adapter. Click finish and stop the VM. Click the light bulb and add a network card.
|
|
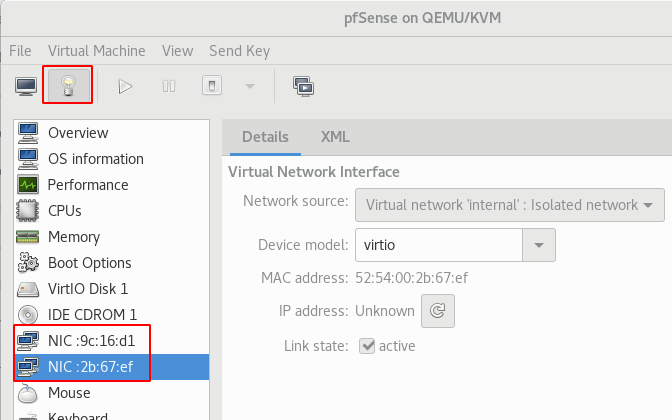
Connect it to our isolated network and you should see two network cards.

|
|
Now, we can power on the machine. If you get an error with "no bootable disk" add the iso to your CDROM. Add the CD drive as boot device.

|
|
Follow the offical guide to install pfSense:
https://docs.netgate.com/pfsense/en/latest/install/install-walkthrough.html
At the end, you should see something like this:
https://docs.netgate.com/pfsense/en/latest/install/install-walkthrough.html
At the end, you should see something like this:
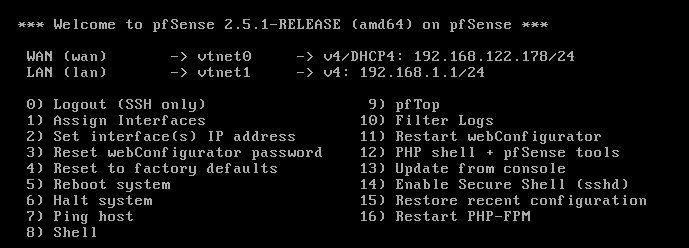
pfSense is running. We have two networks WAN and LAN and both match our wanted setting.
The next step is to configure pfSense via a GUI. The problem is, the GUI is not accessible via the WAN port.
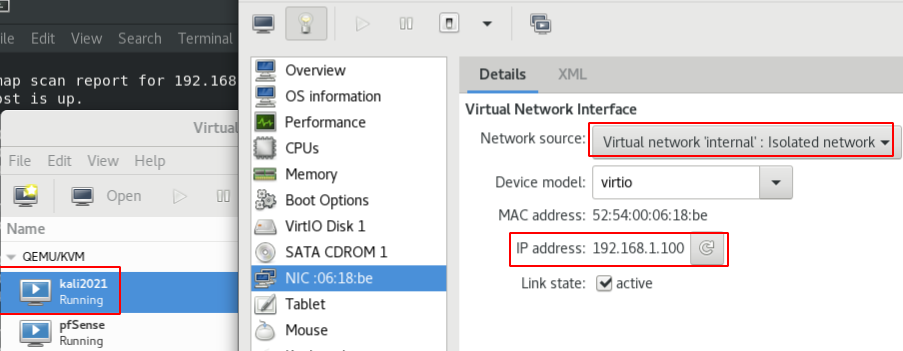
First, we need a VM in the internal network. If you have a VM, switch the network to "internal" and restart the machine. I prepared a Kali Linux.
The next step is to configure pfSense via a GUI. The problem is, the GUI is not accessible via the WAN port.
First, we need a VM in the internal network. If you have a VM, switch the network to "internal" and restart the machine. I prepared a Kali Linux.
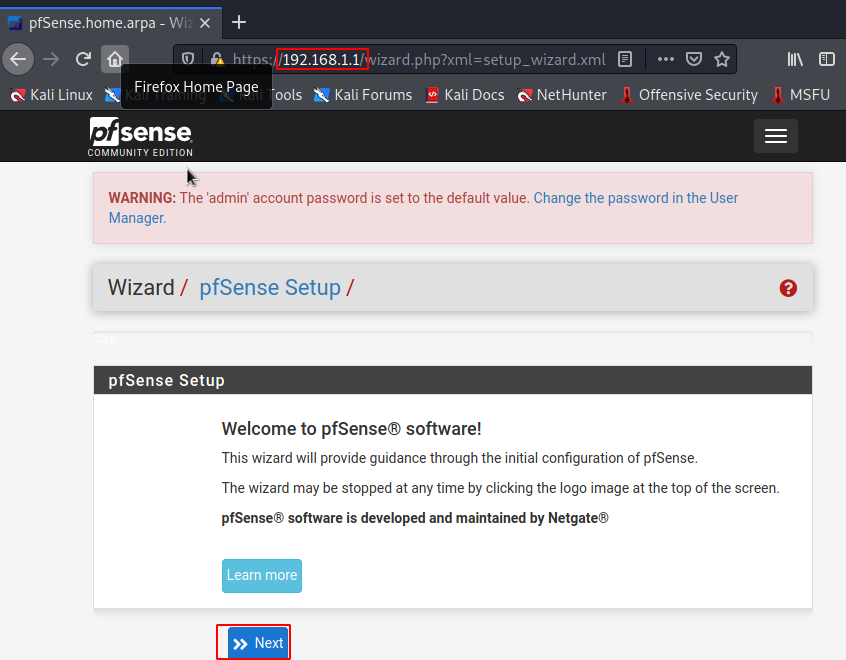
Configure and start your virtual machine. It can be anything with a browser. Access the pfSense configuration page with the LAN address. In my case it is:
192.168.1.1
Type your LAN address into your browser and you see the following screen.
192.168.1.1
Type your LAN address into your browser and you see the following screen.
Follow this guide to set it up: docs.netgate.com/pfsense/en/latest/config/setup-wizard.html
If everything works, your virtual machine has internet access.
pfSense is massive! Just open some menus and get a feeling for the program. Later we have to change some settings, because for Security Onion, we need one more Ethernet card and we need to set up port mirroring.
If everything works, your virtual machine has internet access.
pfSense is massive! Just open some menus and get a feeling for the program. Later we have to change some settings, because for Security Onion, we need one more Ethernet card and we need to set up port mirroring.
© 2021. This work is licensed under a CC BY-SA 4.0 license